A Comprehensive Guide for London Homeowner
Dealing with dust after a restoration job is a regular worry for London residents. Surfaces may collect dust particles, which may have an impact on the purity of the air. This tutorial will provide you practical advice on how to deal with post-renovation dust and keep your house clean and cosy.
Londoners, don’t worry! You can defeat the dust demons and recapture your spotless refuge with a well-thought-out plan and a reliable collection of cleaning supplies.
The Key Is Preparation:
Take proactive measures to reduce dust distribution before the remodeling even starts. Encourage your contractors to employ dust-containment techniques in the workspace, such as plastic sheeting barriers and zipper doors. Seal off vents and entrances as well to stop dust from spreading across the entire house.
Ventilation:
Open windows and doors to allow for appropriate airflow before you start cleaning. This will aid in lowering dust spores in the air and enhance indoor air quality. To make the cleaning process easier, the area must be let to breathe with fresh air.
Dusting and sweeping:
Start by giving your house a thorough dusting and sweeping. Wipe off surfaces with a microfiber cloth or a moist cloth, beginning with higher places like shelves, ceiling fans, and light fixtures. Work your way down to the floor, then the furniture, and then the counters. This method stops dust from settling again on previously cleaned surfaces.
Vacuum with a HEPA Filter:
To capture the smallest dust particles, invest in a high-quality vacuum cleaner with a HEPA filter. To make sure no dust is left behind, vacuum all the floors, carpets, and furniture. Pay close attention to carpet edges, baseboards, and corners.
Put Strategic Cleaning Techniques into Practice:
To begin, use microfiber cloths or electrostatic dusters to dry dust surfaces and collect any loose debris. To remove any last traces of fine dust, follow up with a moist cloth or mop. Be meticulous while cleaning light fixtures, corners, and other difficult-to-reach places.
Professional Cleaning Services, for instance:
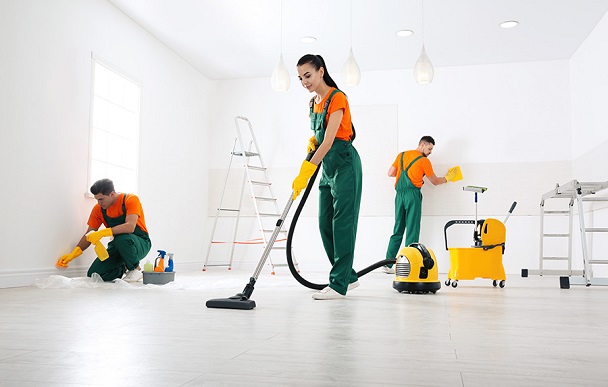
You may save time and assure a complete job by hiring a professional cleaning agency with experience in post-renovation cleanup. Even the most tenacious dust particles may be effectively removed by them since they have the knowledge, tools, and cleaning solutions.
Regularly Check and Replace Filters:
Throughout the post-renovation phase, regularly check and replace HVAC filters, vacuum cleaner bags, and any other filtration systems. By doing so, you can keep the air quality at its best and stop dust from accumulating.
Flooring:
If your remodelling included new flooring, clean and maintain it according to the manufacturer’s instructions. To preserve their look and durability, various flooring kinds, such as hardwood, tile, and carpet, call for particular cleaning procedures.
Last-Minute Dust-Free Home Fixes:
After the thorough cleaning, pay close attention to the little things, such as washing off baseboards, doorknobs, and light switches. To get rid of any remaining dust, wash the carpets, clean the upholstery, and launder the curtains.
Set Cleaning Step Priorities:
Begin from the top and descend from there. Before tackling the flooring and furniture, clean the walls, ceilings, and light fixtures. Here is a detailed cleaning procedure:
Walls and Ceilings:
Use an extending duster to dust ceilings first. To clean walls, use a sponge mop or microfiber cloth. Particular attention should be paid to nooks and crannies where dust likes to collect.
Surface:
Using a HEPA vacuum cleaner, thoroughly vacuum the area. Use a moist microfiber mop to clean hard floors. Steer clear of using too much water as this could harm your flooring.
Fixtures & Furnishings:
All furniture, fixtures, and décor should be cleaned with a microfiber cloth. Remember to wipe down the undersides of chairs and tables.
Glass and Windows:
Use a lint-free cloth and glass cleaner to clean windows, mirrors, and glass surfaces.
Added advice for handling dust after renovations:
- To assist in removing dust from the air, use an air purifier with a HEPA filter.
- Regularly replace your air filters.
- All drapes, curtains, and bedding must be washed or dry cleaned.
- tidying up the bulbs and fixtures.
- Electronics and appliances should be cleaned.
- Clean the upholstery on the furniture.
- Clean off the shelves of books and other objects.
These suggestions will help you deal with dust after a remodelling and make the most of your new area.
So, Londoners, take a deep breath. Even though the dust may have settled, with a little work, you can tame the commotion and restore your dust-free sanctuary.
Conclusion:
You may successfully deal with post-renovation dust in your London house by following these detailed instructions. To achieve a dust-free atmosphere, keep in mind that careful preparation, high-quality filtration, and smart cleaning approaches are essential. Consider hiring cleaning professionals for a hassle-free and perfect result. You’ll be able to enjoy the effects of your restoration without having to deal with residual dust if you stick to these recommendations.


